Scottie Dog Center Island
Or . . .
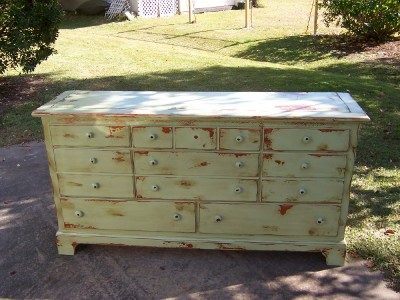
How did this Become This
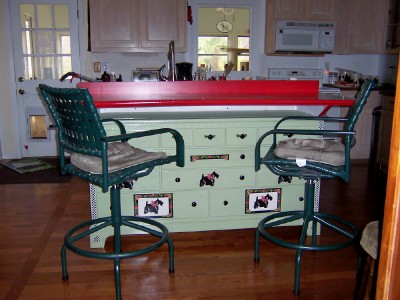
We started with an older dining room piece. It wasn't tall enough to be a counter with our stools, plus the top was flush so we couldn't sit under it. We made a new top that is raised up to make the proper height for our stools, extends out over the piece, and has a kind of cubby hole storage between the old top and the new. 40" T x 74" long. The original piece is 18" deep and the new top is 28" deep.
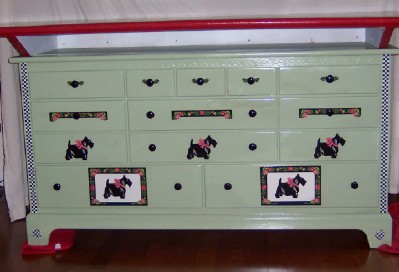
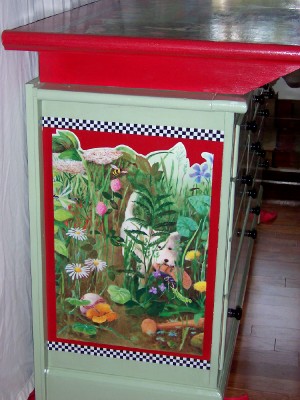
We selected our colors of a light, moss green for the body of the piece and a red for the top. We used two kinds of Scottie dog wall border for the decoration plus some black and white checked masking tape found in Michaels. We wanted a touch of black/white check because our pantry just off the kitchen has a black/white tile floor and an overall decor of black and white.
The top consists of 2, 3/4"plywood boards plus an edging to give it a rounded finished look. We actually used some old chair rail that we had removed from the living room for the edging. Scott routed it to create a kind of bull nosed effect.
The top has three sections of a really pretty, detailed wall border featuring a Wheaten Scottie with a baseball bat, baseball, red wagon, a dragonfly, a frog, and lots of greenery. It's a gorgeous and detailed piece which you can find here: Wheaten Border.
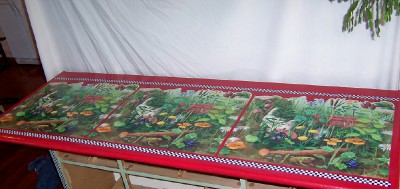
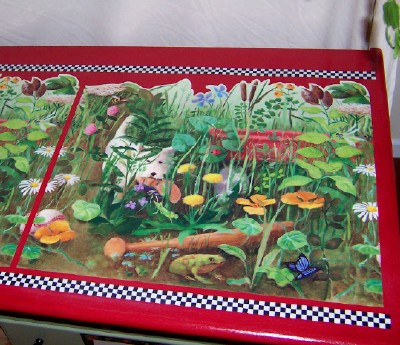
We repeated one section of this wall border w/the black and white check tape on both side panels and used some of the red paint to provide a kind of mat of background for the Wheatie piece.
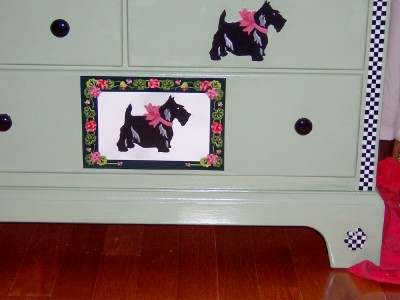
On each of the drawers, which are different sizes, we used a wall border featuring a black Scottie and some flowers. For the narrow drawers at the top of the piece - only the flower design. (See photo at top of page)
For the largest drawers, we used one full panel of the black Scottie design, and for the medium sized or middle drawers, we cut out the black Scottie. The black and white check is repeated down the front at each side and is used as paw prints on the feet of the piece.
Once the piece was repaired, reinforced in the back, and painted, we applied the wall borders to the painted piece just the way you would apply wall border or wallpaper to a wall. Once all the decor was in place and dry, we began varnishing, building up layers of varnish. The drawers and sides do not have as many coats of varnish as the top because the top will be used as our bar or counter to eat at, so needs maximum protection.
For the top we applied several coats and then used a very fine steel wool or sandpaper to smooth it out. Then we used a tack cloth to remove every bit of grit and applied several more coats of varnish. We continued to do this until the top was one smooth layer and the wall border edges could not be felt.
Here it is in position with our green stools and a matching red backsplash we added to protect from the sink and dishwasher on the other side.